Tuesday, June 26, 2012

Thrifters: Buried Alive

I am beginning to feel like a hoarder. Trying to find space for all of our thrifting finds, furniture makeovers and assorted other things that we’ll be selling at our show in July has been an increasing challenge…the basement, the guest room, the closets. There are stashes throughout the house. 


I think part of why I’m not sewing as much lately is that I just can’t concentrate on much more than preparing for this antique/flea show. But, I did another major closet clean out to share with my friends, so I've got a clear idea of some sewing projects to focus on.  I am sort of getting that  feeling of “less is more?”  Or quality is better than quantity? I’m not sure where I am with all that, except that if it doesn't fit, or doesn’t flatter, it needs to go.  That’s pretty much the way I’m handling  my surroundings these days, which could be another reason why it feels like the walls are closing in on me. 


(how adorable is that little iron bistro set?)
 I do know this…if we find that we like doing shows, we need to come up with some storage options or I will lose my ever-loving mind! My daughter just bought a 1930 house that has a basement and stand up attic that I would KILL for. I may have to see if she rents out space!


We've been Annie Sloaning it with quite a few pieces. Here's just a sampling of some things in various states of "done-ness."


(See this little stand? It's an old sewing cabinet, with the guts taken out, a shelf built on the inside and the flip top secured in place. It was a $5 find that will become a very cool side table with storage!)

                                                      (This is a little girl's old vanity table!)

(These two french style end tables have gotten a coat of gray paint)

So, you can see, if I'm not sewing, I'm painting. If I'm not painting, I'm thrifting. If I'm not thrifting, I'm sanding, and if I'm not sanding, I'm stacking and storing and re-stacking! I'm way behind on my blog reading, house-cleaning and napping.

And this weekend, I'm going camping...a nice little get-away where I won't have to do any of the above for two whole days...except the napping part!
Saturday, June 23, 2012

This is why we make a muslin

According to my high bust measurement, I should be cutting a size 20 of  Simplicity 1880 Shirtdress.
Well, I know I've gained a few pounds, but ...
So, that's what I did. After making my horizontal bust dart adjustment, I cut the muslin according to the pattern sizing. And this is what I ended up with:


Clearly, this is too big. But clearly, the horizontal bust dart is doing just what I want it to do. So, I re-marked my pattern, grading from an 18 through the waist (oh, that middle aged spread!) to a 16 through the bust and 18 through the shoulders ( I have broad shoulders). 
I also added an inch to the bodice length. This pattern has a very short bodice.  And my results?


Better. Much Better. Now, I have no concerns about cutting out my fabric and proceeding!  
All of the muslin sewing and adjustments? Took me about 30 minutes, tops. 
And that, my friends,  is why we make a muslin.

Wednesday, June 20, 2012

It all starts with the Girls

I decided on my fabric...well, all of you girls helped me decide:


And here we go! Time to sew! Probably one of the better overall full bust adjustment articles I have found on the web:

http://repository.tamu.edu/bitstream/handle/1969.1/87748/pdf_689.pdf?sequence=1

And why, do you ask, must I give you yet another FBA tutorial? Because most of us are scared the first time we do one! Or we spend ages frustrated with the fit of our sewn garments and then give up. My world changed once I learned how to do a full bust adjustment. And it took lots of research and then lots of guts to cut up that pattern. And that's where many of us get stuck. We see a tutorial, take a glance and think it's too technical or it has too many drawings or not enough drawings,  or whatever. But the fact is, there are a hundred different tutorials and since we all learn differently (some by example, some of us are visual, some of us like to read and process) you need to research. There are even excellent You-tube videos on the subject! And then be willing to cut up or trace one of those 99 cent patterns that you got at Joann's or Hobby Lobby, then actually try it out on about $2.00 worth of muslin...or $1 worth, if you used a 50% off coupon.

Trust me. It will, most certainly, with absolute definity... Change. Your. Sewing. Life. Remember this: It cannot be stated enough:

COMMERCIAL PATTERN COMPANIES ARE DRAFTED FOR A B-CUP BREAST SIZE.
Imagine your boobs. Imagine that in all the world of available bras to buy, there were only B-cups. No A's, no C's, no DD's, no G's. Now, imagine getting your boobs into that B-Cup bra. Now ask the sales lady to bring you a larger band size, but it's still only a B-cup. Does that help? Are you getting the picture? (Trust me, I am laughing at the thought of myself in that dressing room full of B-Cup bras!)

That's why you may need to do a bust adjustment. Changing the band size won't make a difference. You need to add space where your actual girls are attached to your body.
Your boobs will thank you. Your budget will thank you. You will look more slender when your clothes fit correctly. And I would pretty much do anything but give up ice cream every night to look more slender.

I've done them with princess seams, kimono sleeves, no darts, and even those funky twisty oragami style bodices (see my example here) but I had never done an adjustment by adding a dart. And I am about to try.

My Sew-Along pattern, Simplicity 1880, does not have a bust dart. Being a shirt waist dress, it could use one...especially for the more bosomous of us. I was thinking and thinking about how to do that silly adjustment and it hit me while I was browsing at Macy's during my lunch hour yesterday. I checkout out shirt after tailored shirt...many with a slightly gathered front yoke, and there it was...The Horizontal Bust Dart. And that was my answer.

Tonight, I did my research, I took my measurements and proceeded to slash up my pattern ( I'm not a big tracer OR measurer...I really do make many of my adjustments by instinct and intuition).


The muslin is cut out and ready to sew tomorrow morning since I can't bear to work in my sewing room any more tonight with no AC.


Oh, see there? I actually DREW my bust dart with marker onto my muslin! And that particular muslin? It was a muslin in it's previous life...two muslins for the price of one! Now, if this project of mine doesn't work out, I'd be happy to buy another pattern and spare another yard of something to try again. Because I want this to work.

And it will.

Monday, June 18, 2012

HotPatterns Plain and Simple Superfantastic Shirt!

I like to call it a pop-over.
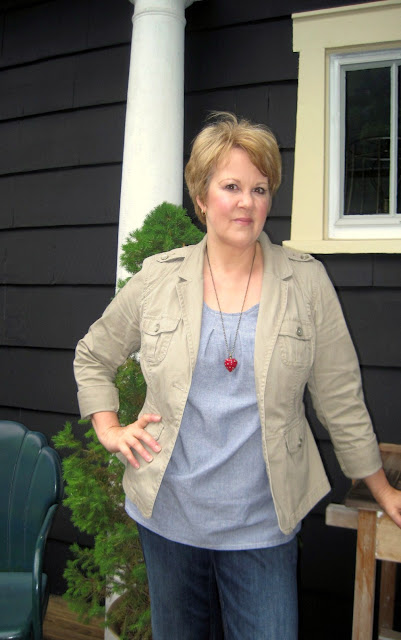
I’ve made it once before, but this version is waaaaay better than my first version. Maybe it’s the collar and stand, maybe it’s my fabric, but I love it. And I can’t wait to make another one.

The style is easy, but there are a few special touches that make it a notch above in the style department.
1.       The collar and stand.
2.       The bust darts
3.       The side shaping.

So, it’s not boxy, and can be easily belted or worn loose.


The fabric is from the Joann’s Lisette line. Have you used any of it? It’s actually my favorite fabric line at the store. I tend to buy more of it than any other stuff from Joann’s because of the quality.  This particular fabric is a cotton sateen. But it has a wonderful drape and softness to it, making it perfect for this type of top. I didn’t have quite enough to do the long sleeve version or the collar stand facing, so I made my sleeves ¾, to roll up. And a used a cute contrast cotton for the facing. Besides, I like having that pink color next to my face.


I am a fan of HotPatterns.  This shirt has some really cool construction techniques for the placket front which pretty much guarantees a good result.  However… and this is a usual part of my review of Hot Patterns…. unless you are a more experienced seamstress, I think it would be challenging to work through the instructions as written. But I love Trudy’s You-tube videos and I’m always inspired to try some different techniques as well as style options with the patterns.


Oh, and my Superfantastic bargain of the day?


An Ott Lite with the bulb on clearance of  75% off! With an additional 10% off coupon, I brought her home for just over $26!

Saturday, June 16, 2012

Yup, we were there last night!


Last Night, Nik Wallenda walked  a tightrope which spanned the US to Canadian Falls at Niagara.  I don’t know why, but I have been extremely giddy at the thought...totally caught up in the media coverage and excitement. My co-workers even left me a little Nik Wallenda in my office doorway yesterday! 


And I know, there was the controversy over the tether, but the fact that he would stand in a place over Niagara Falls where no-one has ever been before is an amazing feat in itself. So, after much convincing, I got my husband to drive us to the Falls, and then we biked onto Goat Island to watch with thousands of others on a Jumbo Tron. (we were not one of the 4,000 luck ones to get best seating on Terrapin Point)


The crowds were manageable and well-behaved (other than being called an ***hole once) there were no major incidents to distract from this historic event.

Maybe it’s the lure and legend of the Falls. Maybe it’s because it’s only minutes from where I live, but I LOVE Niagara Falls. It’s not uncommon for JR and I to spend an afternoon or evening there, walking the riverside, traipsing along with all the tourists on the paths along the river.


Getting as close to the spray as we can.


It is a place where we always feel humbled and small in the midst of the magnificence. Each visit brings  a new discovery, an AHHHH  moment. 

So, naturally, I craved being amidst all the excitement of this tightrope walk.


 And the most dangerous moment of the whole night? It occurred  when, as we were leaving last night, I  tried to pull a stunt of my own, weaving  in and out of the mass exodus. The bike tire caught, I went flying off onto the pavement.  When I went down, there was a collective sound that one might have heard from the crowd had Nik Wallenda himself  slipped on the tightrope! But people were kind, and I was able to get my bruised and battered self up off the ground and ride on....bloodied and aching, but SO glad that we were able to be there...a part of something pretty spectacular, if you ask me. Today? I'm not able to lift my arm over my head or hold a bag of groceries, but I'm about to go watch it on television once again, and know that anyone can do anything if they set their minds to it.

Wednesday, June 13, 2012

Help a girl decide? Please?


How about a little sew-along? Sunni, at A Fashionable Stitch is hosting a Two in One Sew-Along.  Since I had the pattern already, and also some fabric ( Lord knows, lots of fabric...) and intentions of making a shirt dress or two, I decided to play along.

 This is the pattern:
Simplicity 1880


 My fabric? I have a couple of choices..


So maybe you can help me decide. I am totally stumped...will it be the fresh beachy stripe  or a classic faded chambray?  The navy ditsy floral lawn or a bold pink gingham? The vintage fruity cotton  or a pink/gray/white doily print?

I'd love for you to share your thoughts. I am going to do the shirtwaist version with 3/4 sleeves.  Until then, here's a little peek at a project in the works:


Wednesday, June 6, 2012

Me and my bright ideas

JR stopped by the bathroom this morning to give me the once-over and said, “you probably have a different outfit for every day of the year, don’t you?” 
I started pondering it, and yes, if I  think about good old-fashioned statistical combinations/permutations, I  could probably mathematically manage to have a different outfit for every day of the next few years...calculate accessories into those combinations and I'm scared!


So it goes with the creative mind. I envision it, I must execute it. Sometimes my head gets so full of ideas that I can’t possibly execute them all, even though I really, really want to. So while my closet is chock full,  I still think of things I want to sew…what would still make the perfect wardrobe. 


It's that way with just about everything...when I get a bright idea, I have to make it happen. But I can’t keep everything I create, so there is a constant pile of stuff that I share with friends or donate or sell. I guess that’s the only way I can manage it.


These days, I’m thinking home and garden stuff. Making slipcovers, painting, updating a room, re-doing furniture.  On some recent thrifting adventures, we picked up some very, very interesting lamps, and I immediately started imagining of ways to make them even more interesting and fun. And since I can’t keep them all,  I will enjoy them for a time, and then they will be sold, instead of collected. That way, I guess at least two people get to enjoy the creative process, right?


With these two vintage lamps, I removed the silk fabric from the shades. I love the architectural look that it creates. Then each was wrapped with something whimsical...the bust lamp got an equally scaled burlap bow around the lampshade frame...it's a fun juxtaposition of  smooth ceramic and rustic burlap. The second lamp is a delicate lady's lamp with a mirror and glass bottom. This frame got wrapped with some similarly delicate green wired silk flowers. 


This fun little elephant lamp only needed  a sweet vintage lampshade to top it off.

So, I wonder? How do you manage your creative mind and the abundance of stuff that results from it? You know what I’m talking about if you have this same affliction/gift.  Let’s discuss!

Monday, June 4, 2012

Simplicity 2892

Pleeeeaaaaasssssseeeee help me get my sewing groove back on! I don't know what's the matter with me! I always told my students that when they felt overwhelmed with projects or startitis, to just do something simple. A simple project that you know is failproof and can be finished quickly. A no-brainer project. So, I took a dose of my own remedy and made a few simple tops.

When inspired by something, anything...I have a hard time thinking of anything else.
When I first saw the Cabi RompTop, I spent hours searching the internet for "paper finish chambray" and finally had to settle for washed and re-washed and washed again chambray, without a paper finish. I found my chambray at Joann's.  But I'm still looking for what would be considered a paper finish! The pattern?  Simplicity 2892. View A, without sleeves.


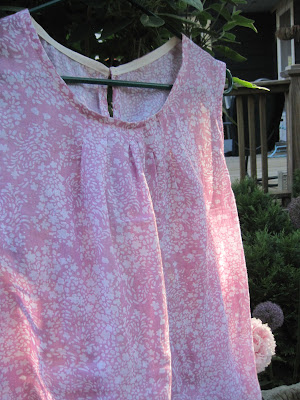
                     And I made yet another one, from some stash fabric...a semi-sheer linen blend print.


I did without the facings, scooped out the neck a bit,  and sewed a bias binding facing instead.
And my usual FBA.
The method I use so I don't have to add a dart is a simple slash method, illustrated here.


It's a cute basic top. I would suggest you try it! It might be just the thing you need to get you out of your sewing slump.